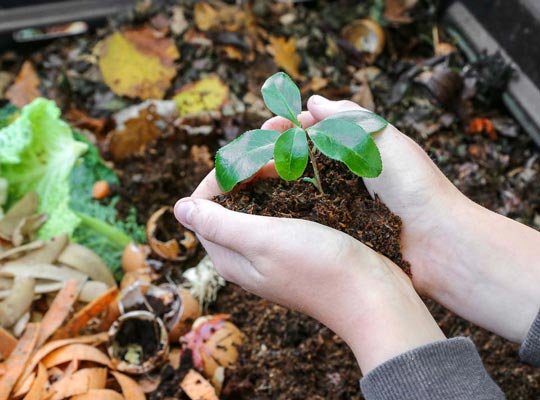
Gardeners call it black gold — dark, crumbly, sweet-smelling compost that makes plants explode with growth. And the wildest part? You make it from stuff you were throwing away: coffee grounds, eggshells, fall leaves, and yesterday’s salad.
Composting is the single highest-return habit on a homestead. It turns waste into free fertilizer, cuts your trash, and feeds your soil for exactly zero dollars. Here’s everything a beginner needs to know to start this weekend.
What Is Composting, Really?
Composting is just controlled rotting. Billions of microorganisms — bacteria, fungi, worms, and beetles — eat your scraps and bedding, and their leftovers become humus: the rich, stable organic matter that makes soil alive.
A finished pile looks and smells like forest floor. It holds water like a sponge, feeds plants slowly for months, and teems with the biology that chemical fertilizers can’t provide. Bagged compost at the garden center costs $5–$8 per cubic foot. Yours is free.
New to homesteading entirely? Compost is one of the core first-year skills in https://amesfamilyfarm.com/homesteading-for-beginners-skills/.
The Golden Rule: Greens vs. Browns
Every successful pile comes down to one ratio:
- Greens = nitrogen-rich, moist materials. Fruit and vegetable scraps, coffee grounds and filters, fresh grass clippings, eggshells, tea bags, fresh manure (chicken, rabbit, horse).
- Browns = carbon-rich, dry materials. Fall leaves, straw, shredded cardboard, newspaper, wood chips, sawdust, dried corn stalks, pine needles.
Aim for roughly 3 parts browns to 1 part greens by volume. (Old books say 25:1 carbon-to-nitrogen; the 3:1 volume rule gets you there without a chemistry degree.)
Too many greens → slimy, stinky, ammonia-smelling pile.
Too many browns → dry pile that sits there doing nothing for a year.
When in doubt, add more browns. Browns are almost always the fix.
5 Ways to Start (Pick One)
1. The simple pile. Heap materials in a 3×3×3-foot pile in a back corner. Free. Works great.
2. The pallet bin. Screw three wooden pallets together into a U-shape. The classic homestead bin — free if you can find pallets.
3. The tumbler. A sealed barrel on a frame you spin. Faster, tidier, pest-proof — but costs $80–$150 and holds less.
4. The trench. Dig a trench in a garden bed, bury scraps, cover with soil. Zero bin, zero turning, invisible.
5. The worm bin. Red wigglers in a tote under the sink turn kitchen scraps into castings — the richest compost of all. Perfect for apartments.
Your First Pile: Step by Step
1. Choose a spot. Level ground, partial shade, near a water source and near your garden. Convenience matters — you’ll use it more.
2. Lay a brown base. Start with 4–6 inches of coarse browns (sticks, straw, wood chips) for airflow underneath.
3. Add greens and browns in layers. Kitchen scraps and fresh clippings (greens), then a thick layer of leaves or shredded cardboard (browns). Repeat.
4. Water it. The pile should feel like a wrung-out sponge. Dry piles stall; soggy piles stink.
5. Bury fresh food scraps. Always cover new kitchen scraps with 4–6 inches of browns. This is the secret to a pile that never smells and never attracts pests.
6. Turn it (or don’t). Turning every 1–2 weeks speeds things up dramatically. Never turning still works — it just takes 6–12 months instead of 3. This is called cold composting, and it’s perfectly fine.
7. Harvest. When the pile is dark, crumbly, and earthy-smelling with no recognizable scraps, it’s done. Sift out any chunky bits and toss them into the next pile.
The 90-Day Timeline
Here’s what to expect from an actively managed (turned) pile started in spring:
- Days 1–3: The pile heats up. A thermometer stuck in the center should read 130–150°F. This heat kills weed seeds and pathogens.
- Weeks 2–4: Peak activity. Turn weekly, keep it moist. The pile visibly shrinks — a 3-foot pile becomes 2 feet.
- Weeks 5–8: Cooling phase. Temperature drops toward 100°F. Fungi and worms move in and do the finishing work.
- Days 75–90: Curing. The pile looks like dark soil and smells like a forest. Screen it, and it’s ready for the garden.
Cold (unturned) piles follow the same arc in slow motion: 6–12 months. Both make excellent compost.
5 Things NEVER to Compost
1. Meat, dairy, fats, and oils. They go rancid, stink, and attract rats, raccoons, and every pest in the county.
2. Pet waste from dogs or cats. It can carry parasites and pathogens that survive home composting temperatures.
3. Diseased plants. A home pile may not get hot enough to kill blight, rust, or mildew — you’ll just spread it next year.
4. Weeds gone to seed. Same problem. Unless your pile reliably hits 140°F+, seeded weeds become a weed-seed bank.
5. Glossy paper, magazines, and treated wood. Inks, coatings, and pressure-treatment chemicals don’t belong in food-growing soil.
Common Mistakes
The stinky pile. Almost always too many greens, too wet, or both. Fix: turn it and add a big armload of dry browns. The smell disappears within a day.
The dead pile. Dry as dust and nothing happening. Fix: water it thoroughly and add fresh greens (grass clippings, coffee grounds) to wake the microbes up.
The fruit-fly cloud. Food scraps sitting exposed on top. Fix: bury every addition under browns. Every single time. This one habit prevents 90% of compost complaints.
Composting like it’s a trash can. If you wouldn’t want it in your garden soil, don’t put it in the pile. When in doubt, leave it out.
FAQ
How do I start composting with chickens?
You’re sitting on a gold mine. Chicken manure is a nitrogen powerhouse, and soiled coop bedding is the perfect green-brown mix already combined. The deep litter method (https://amesfamilyfarm.com/deep-litter-method-chickens/) essentially composts right inside the coop. Toss soiled bedding from winter coop cleanouts straight onto the pile in spring for a nitrogen boost.
Does composting attract rats?
A properly managed pile — scraps always buried under browns, no meat or dairy — rarely attracts rodents. An open pile of exposed food scraps absolutely will. The burying habit is everything; a lidded bin or tumbler adds insurance if your neighborhood has heavy rodent pressure.
Can I compost in winter?
Yes. The pile goes dormant in freezing weather and wakes up in spring. Keep adding materials all winter — they just stack up and start cooking when temperatures rise.
How much compost will I actually get?
A cubic yard of raw materials (a 3×3×3-foot pile) shrinks to roughly ⅓ cubic yard of finished compost. Plan on one full pile per 100 square feet of garden per year.
Is store-bought compost just as good?
It’s fine, but homemade wins on biology: your pile teems with local microorganisms adapted to your soil. Plus it’s free — which is the whole point.
Start This Weekend
Grab a corner of the yard, rake up some leaves, and dump today’s coffee grounds and vegetable peels on top. Cover with more leaves. Congratulations — you’re composting.
In 90 days you’ll be spreading black gold on your garden, and you’ll never pay for bagged fertilizer again. Pin this guide and start your first pile today — your soil (and your wallet) will thank you.