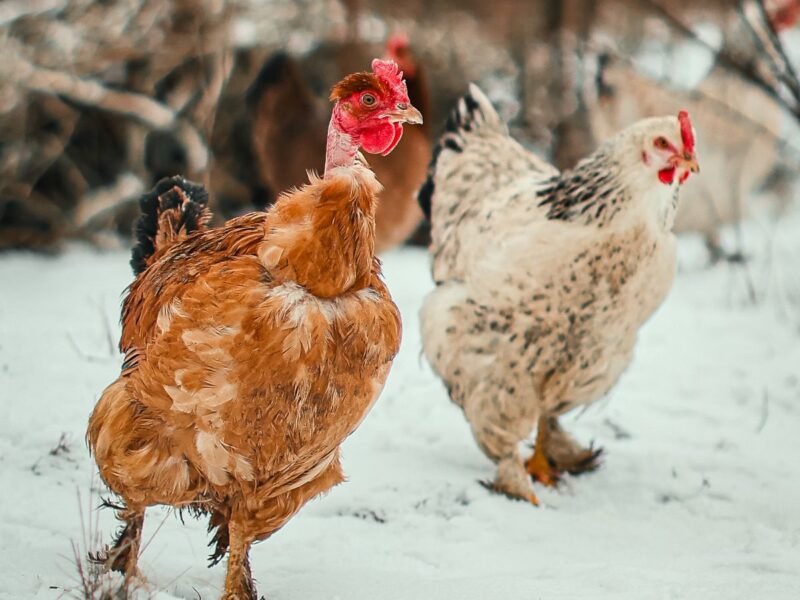
If you’ve ever watched your hens flop over in a sunny patch of dirt, kick dust everywhere, and wriggle around like they’re having the time of their lives — congratulations, you’ve watched a dust bath. It looks ridiculous. It is also one of the most important health behaviors your flock has.
Dust bathing is how chickens clean themselves. The fine dust works down through their feathers to the skin, absorbing excess oil and smothering the external parasites — mites and lice — that plague every flock eventually. Hens with regular access to a good dust bath have glossier feathers, calmer temperaments, and fewer parasite problems. Hens without one will try to bathe in the coop bedding, the feed area, or your garden beds.
The good news: a proper dust bath costs about $10, takes 20 minutes to build, and lasts for months. Here’s my exact recipe.
Why Dust Bathing Matters So Much
In the wild, jungle fowl — the chicken’s ancestor — dust bathe daily. It’s instinct, not a luxury. When a hen can’t dust bathe, you see the fallout: dull, ragged feathers, restless behavior, feather-pecking flockmates, and parasite loads that quietly build until you’re dealing with a full-blown infestation.
Think of the dust bath as preventive medicine. It doesn’t replace treatment when mites get out of hand — if you’re already seeing bald patches and scabs, read a dedicated guide on getting rid of coop mites — but a flock that dust bathes daily rarely reaches that point. I consider the dust bath as essential as the feeder and waterer.
📌 Pin this: A dust bath isn’t a nice extra — it’s preventive health care. Flocks with daily dust-bath access have dramatically fewer mite and lice problems.
The DIY Dust Bath Recipe
My go-to mix is simple, cheap, and proven. For one standard dust bath (about the size of a large storage tote):
- 4 parts fine dirt or sandy soil — the base. Dig it from your yard if your soil is loose, or buy a bag of topsoil (not potting mix with fertilizer).
- 2 parts construction sand — coarse, washed sand adds the gritty texture that does the real cleaning work. Avoid fine play sand; it compacts.
- 1 part food-grade diatomaceous earth (DE) — the parasite-fighting ingredient. Must be food-grade, not pool-grade.
- 1 part wood ash — from a fireplace or fire pit burning untreated wood only. Ash is alkaline and parasites hate it. Optional but excellent.
- A handful of dried herbs (optional) — lavender, mint, or rosemary. They smell nice and may mildly repel insects.
Mix everything dry in a wheelbarrow or bucket. The final texture should feel like dry, powdery beach sand — fine enough to puff up in a cloud when a hen flaps in it.
A quick word on DE: use food-grade diatomaceous earth, wear a dust mask when mixing (the fine silica dust isn’t great to breathe), and don’t treat it as a miracle cure — it’s one ingredient in a system, not a standalone solution.
Step 1: Pick the Right Container
Chickens will dust bathe in anything that holds the mix, but some containers work better than others:
- A large plastic storage tote (my favorite) — cheap, portable, and the high sides keep the mix contained
- A kiddie pool — great for big flocks, easy to find secondhand
- A wooden box or old drawer — rustic and sturdy
- A tire — free, heavy enough to stay put, and the round shape suits a bathing hen perfectly
- A shallow hole in the run — the zero-cost option; dig a wide, shallow depression and fill it
Size matters: one container per 6–8 hens is plenty, and bigger is better — hens love bathing together, and watching three hens cram into one tote is pure comedy.
Step 2: Choose the Perfect Spot
Location makes or breaks a dust bath. Hens prefer:
- Sunny and dry — they’ll sunbathe while they dust bathe; morning sun is ideal
- Sheltered from rain — wet mix turns to mud and grows mold. Under the coop overhang, inside the covered run, or under a simple lean-to works
- Near the coop, not far away — hens bathe most right after laying, so keep it close to their daily routine
- On level ground — so the container doesn’t tip when a 7-pound hen launches herself into it
My setup: two totes under the run’s roof overhang, where they stay dry but catch the morning sun. The hens visit them like a spa.
Step 3: Fill and Fluff
Pour your mixed recipe into the container, 4–6 inches deep. Fluff it with a hand rake so it’s loose and powdery — packed-down mix doesn’t work into feathers properly.
Then step back and watch. If you’ve never seen a first-timer discover a fresh dust bath, you’re in for a treat: the cautious peck, the sideways flop, the frantic kicking, and finally the blissed-out wriggle with one wing stretched out. Within a week, there’ll be a queue.
Keeping It Working: Maintenance
A dust bath isn’t set-and-forget. Ten minutes of maintenance a month keeps it effective:
- Top off monthly — hens kick mix out and it compacts. Add a fresh scoop of your mix every few weeks.
- Fluff weekly — break up compacted spots with a rake, especially after rain sneaks in.
- Replace fully 2–3 times a year — dump the old mix (it’s great added to the compost pile) and refill fresh. Old mix accumulates droppings and loses its powdery texture.
- Keep it dry — if the mix gets soaked, dump it. Wet dust bath mix is worse than none at all.
- Watch usage — a sudden drop in dust bathing can signal illness, bullying, or a parasite problem bad enough that bathing alone isn’t cutting it.
📌 Pin this maintenance schedule: Fluff weekly, top off monthly, full refresh each season. Put it on the same calendar as your coop deep-clean.
Winter Dust Baths
Here’s what surprises beginners: hens need dust baths in winter too, arguably more — they’re cooped up longer, in closer contact, which is exactly when mites spread fastest.
The problem is that outdoor ground freezes and outdoor baths get buried in snow. The solution: move a dust bath inside the coop or covered run for winter. A tote of dry mix in a sheltered corner keeps the habit going all season. Your winter mite pressure will thank you — and while you’re winterizing, make sure the rest of the coop is ready with winterize chicken coop checklist.
Common Mistakes
Using only play sand. Fine play sand compacts into concrete-like slabs and holds moisture. The mix needs variety — dirt, coarse sand, ash — to stay powdery.
Putting it where rain hits. One good storm turns a dust bath into a mud pit. Shelter is non-negotiable.
Using pool-grade DE or treated-wood ash. Pool-grade DE is chemically treated and unsafe; ash from pressure-treated lumber or painted wood contains toxins. Food-grade DE, plain hardwood ash only.
One tiny bath for 15 hens. They’ll fight over it, the mix will vanish in days, and half the flock won’t bother. Scale up: roughly one good-sized bath per 6–8 birds.
Forgetting about it. A dust bath full of compacted, poop-flecked mud is a health hazard, not a health aid. The maintenance schedule above exists for a reason.
If parasites do break through despite good dust bathing, don’t panic — it happens, especially with new birds introduced to the flock. Treat promptly, then keep the dust baths going as your ongoing defense.
Level Up: The Dust Bath Station
Once the basic bath is a hit, consider a small upgrade that costs nothing:
- A dusting “puff” area: some keepers add a shallow tray of pure wood ash next to the main bath — hens will use it for targeted touch-ups.
- Herb garden nearby: plant mint and lavender around the run. Hens nibble them, the smell is pleasant, and you’re already growing them for the bath mix.
- A second bath in the far run: if your run is large, two stations prevent the walk-of-shame for lower-ranking hens who get chased off the prime spot.
None of this is required. But watching your flock’s feather condition improve over a month of good dust bathing is one of those quiet homestead satisfactions — like the first egg, or bread that actually rises. Speaking of which, a morning collecting eggs and checking the dust baths pairs well with a warm loaf of no knead farmhouse bread.
For chicks, by the way: they’ll start play-bathing in the brooder shavings within the first couple of weeks — it’s instinct. A tiny dish of clean sand in the brooder from week two gives them a safe place to practice. More on those early weeks in raising baby chicks for beginners.
FAQ: DIY Chicken Dust Baths
How often do chickens dust bathe? Daily, given the chance — usually in the late morning or early afternoon, often right after laying. It’s social, too; where one hen bathes, others follow.
Can I just let them bathe in the dirt? If your soil is loose, dry, and sandy, plain dirt works okay. But most yards are clay-heavy or compacted, and plain dirt lacks the parasite-fighting boost of ash and DE. The recipe above is meaningfully better for about $10.
Is diatomaceous earth safe for chickens? Food-grade DE is widely used in coops and dust baths. The main precaution is for you: wear a dust mask when handling the dry powder, since breathing fine silica dust irritates lungs. Once mixed and settled, it’s fine.
My hens won’t use the dust bath. What am I doing wrong? Usually location or texture. Move it to a sunnier, drier spot, fluff the mix so it’s powdery, and try sprinkling a little scratch grain on top to lure the first curious hen. Once one hen uses it, the rest copy within days — chickens are flock learners.
Do ducks or other poultry use dust baths? Ducks prefer water bathing, but they’ll occasionally dust bathe too. Turkeys and guineas love dust baths just like chickens. One station can serve mixed poultry.
Conclusion
A DIY chicken dust bath is one of the highest-return projects in backyard chicken keeping: $10, 20 minutes, and your flock gets daily parasite prevention, better feathers, and visible joy. Mix the recipe, pick a sunny sheltered spot, and let instinct do the rest.
Your action step this week: Grab a storage tote, mix one batch of the recipe, and set it in the run this weekend. Then pull up a chair with your morning coffee and watch the spa open for business.
📌 Pin this recipe so your mix ratios are saved for every seasonal refresh — and share it with the friend who’s battling mites with chemicals alone. The dust bath might be the missing piece.