The first jar of sauerkraut I ever made sat on my counter for three weeks while I hovered over it like a nervous parent. Is that bubbling normal? Is that smell right? Should it look cloudy? I nearly threw it out twice. Then I tasted it — tangy, crunchy, alive — and I understood why people have been doing this for thousands of years.
Here’s the secret nobody told me: fermenting vegetables is genuinely one of the simplest preserving skills on a homestead. Simpler than https://amesfamilyfarm.com/water-bath-canning-for-beginners/, honestly. No boiling-water bath, no special equipment, no precise processing times. Salt, vegetables, a jar, and patience. That’s the whole recipe.
If the garden is burying you in cabbage, carrots, and cucumbers and you’re tired of the same old canning routine, fermentation is your next move. This guide walks you through everything a beginner needs: the science in plain English, the basic method, five foolproof first ferments, and how to fix the things that go sideways.
What Fermentation Actually Is (No Science Degree Required)
Fermentation is just controlled spoiling — in the best possible way. Naturally occurring beneficial bacteria (mostly Lactobacillus species) live on the skins of all vegetables. When you submerge vegetables in a salty brine, you create an environment where the good bacteria thrive and the bad microbes can’t.
Those good bacteria eat the natural sugars in the vegetables and produce lactic acid. That acid is what gives fermented vegetables their signature tang, and it’s also what preserves them — most spoilage organisms can’t survive in an acidic environment.
That’s it. No starter culture to buy, no special inoculant, no lab equipment. The bacteria are already on your vegetables. Salt plus submersion plus time does all the work.
Why Bother Fermenting?
A few honest reasons this skill earns its counter space:
- Unbeatable flavor. Fermented vegetables taste like nothing else — bright, tangy, complex. Store-bought kraut (usually pasteurized, which kills the live cultures) doesn’t come close.
- It extends the harvest without heat. Canning is wonderful, but it cooks everything. Ferments stay raw and crunchy, and they keep for months in cold storage.
- Simple and cheap. A jar, salt, and vegetables. That’s the equipment list.
- It uses the “ugly” produce. That cracked carrot and the oversized cucumber nobody wants to eat fresh? Perfect ferment material.
- It’s deeply satisfying. There’s something primal about opening a jar you made three weeks ago and tasting something delicious that you created with nothing but salt and time.
This pairs beautifully with my https://amesfamilyfarm.com/cabbage-recipes-farm-to-table/ collection — when you’ve cooked your way through the fresh cabbage recipes, ferment the rest.
What You Actually Need
Forget the specialty kits. Here’s the real beginner equipment list:
- Mason jars (quart size is ideal). Wide-mouth jars make packing easier.
- Non-iodized salt. Sea salt, pickling salt, or kosher salt. Avoid table salt with anti-caking agents — they can cloud the brine.
- A kitchen scale. Salt ratios work by weight, and this is the one place precision matters. A $10 scale is fine.
- Something to keep vegetables submerged. Glass fermentation weights are nice, but a small jelly jar that fits inside the mouth of your mason jar works just as well. Even a clean cabbage leaf folded over the top does the job.
- A cloth cover or loose lid. Fermentation produces CO2, so you need gas to escape. A coffee filter secured with a rubber band works perfectly.
📌 Pin this: The only number you need to memorize is 2%. A 2% salt brine (20 grams of salt per 1,000 grams / 1 liter of water) is the beginner-safe standard for most vegetable ferments.
The Basic Method: Salt, Submerge, Wait
Almost every vegetable ferment follows the same pattern:
- Prep your vegetables. Wash them, chop or shred as the recipe calls for.
- Salt them. Either massage dry salt into shredded vegetables (for kraut) or mix a 2% brine and pour it over chunky vegetables.
- Submerge everything. This is the golden rule of fermentation: vegetables below the brine stay safe; vegetables exposed to air invite mold. Pack tightly, press out air pockets, and weight everything down.
- Cover loosely and wait. Room temperature (65-72°F is ideal) for anywhere from 3 days to 3 weeks depending on the vegetable and your taste.
- Taste and refrigerate. When the tang is where you like it, screw the lid on tight and move the jar to the fridge. Cold storage slows fermentation to a crawl — your ferments keep for months.
5 Foolproof First Ferments
Start with these. They’re forgiving, fast, and delicious.
1. Classic Sauerkraut
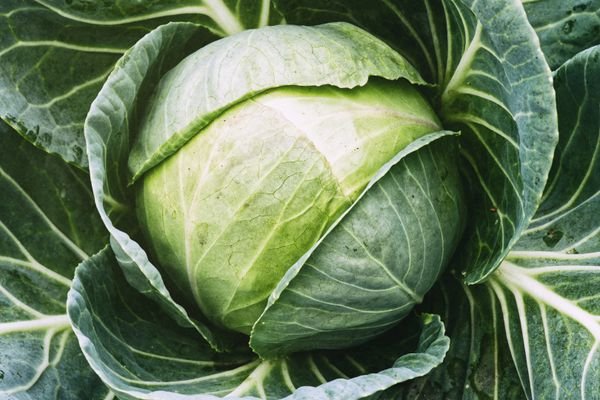
The gateway ferment. Shred a head of cabbage, toss with 2% salt by weight, massage until it releases its own juice, pack it tight into a jar with that juice covering everything. Ferment 2-4 weeks. The transformation from raw cabbage to tangy kraut still amazes me every time.
2. Dilly Carrot Sticks
Peel carrots, cut into sticks, pack into a quart jar with a few sprigs of fresh dill and a clove of garlic. Pour 2% brine over, weight down, ferment 5-7 days. Crunchy, garlicky, addictive — these disappear fast in our house.
3. Fermented Garlic
Peel whole cloves (the tedious part — a silicone tube peeler helps), cover with 2% brine, ferment 3-4 weeks. The raw bite mellows into something buttery and complex. Amazing minced into dressings or eaten straight by garlic lovers.
4. Curtido (Salvadoran Cabbage Slaw)
Shredded cabbage, grated carrot, thin-sliced onion, oregano, and a little red pepper flake, massaged with 2% salt. Ferments in about a week. Bright, lightly spicy, and incredible on tacos or alongside beans and rice.
5. Brined Green Beans
Trim fresh green beans, pack upright in a jar with garlic and dill, cover with 2% brine, ferment 5-7 days. They stay snappy and develop a wonderful sour-dill punch. A completely different animal from https://amesfamilyfarm.com/how-to-can-tomatoes/-style canned beans.
Troubleshooting: What’s Normal and What’s Not
Beginners worry about everything. Here’s the quick guide:
- Cloudy brine: Completely normal. That’s the bacteria doing their job.
- Bubbling and fizzing: Normal and good — that’s CO2 from active fermentation.
- White film on top (kahm yeast): Harmless but can taste off. Skim it, make sure everything is submerged, carry on.
- Fuzzy mold (blue, green, black, pink): Not okay. If mold is only on a floating piece you can remove, some experienced fermenters salvage the rest — but as a beginner, when in doubt, throw it out. Your health is worth more than a jar of carrots.
- Mushy vegetables: Usually means the ferment got too warm or went too long. Still safe if it smells fine, just softer.
- Slimy brine: Occasionally happens with certain vegetables. If it smells okay, it’s usually fine; the sliminess often resolves.
- Everything smells rotten (not sour): Trust your nose. A good ferment smells tangy and pleasantly sour. A bad one smells like garbage. Discard anything that smells wrong.
📌 Pin this: The submersion rule prevents 90% of fermentation problems. If every scrap of vegetable stays under the brine, mold has nowhere to land.
How to Tell When It’s Done
There’s no timer — your taste buds are the instrument. Start tasting after 3-4 days (for quick ferments like carrots) or 2 weeks (for kraut). You’re looking for:
- A pleasant tangy-sour flavor that makes your mouth water
- Vegetables that still have crunch (except garlic, which softens)
- A clean, sour smell — no off or rotten notes
When it tastes right to you, it’s done. Refrigerate it. The flavor will keep developing slowly in the fridge, getting more sour over months — which is why I always label jars with the date.
Storing Your Ferments
Once refrigerated, most vegetable ferments keep 4-6 months easily. Keep them in jars with tight lids in the fridge. The brine may get cloudier and the flavor sharper over time — both normal.
For truly long-term storage without refrigeration, a cold root cellar (35-40°F) works the same way. Our grandparents kept barrels of kraut in the cellar all winter. The fridge is just the modern version.
Do You Need Special Fermentation Lids?
Walk into any homestead supply shop and you’ll see airlock lids, silicone pickle pipes, and fermentation crocks with water-sealed moats. They’re nice — but you don’t need any of them to start.
A plain mason jar with a loose lid or a cloth cover ferments vegetables perfectly well. The airlock’s job is to let CO2 out while keeping oxygen (and mold spores) from drifting in, which slightly lowers your risk. If you catch the fermentation bug and start running six jars at once, a $12 set of silicone airlock lids is a worthwhile upgrade. But don’t let gear stop you from starting — my first three successful ferments happened in ordinary jars with coffee filters rubber-banded over the top.
One upgrade I do recommend early: real glass fermentation weights. They’re $10-15 for a set, they fit perfectly inside wide-mouth jars, and they make the submersion rule effortless. Improvised weights work, but they shift, they float, and fishing a floating jelly jar out of brine gets old.
Quick Recap
Fermenting vegetables is simpler than it looks: salt at 2%, keep everything submerged, wait, taste, refrigerate. Start with sauerkraut or dilly carrots — they’re nearly foolproof — and work your way up to garlic and curtido. Trust your nose, respect the submersion rule, and don’t fear the bubbles.
Once you’ve got a few ferments bubbling on the counter, you’ll wonder why you ever thought preserving the harvest meant standing over a boiling canner all day. Both skills have their place — but fermentation is the one that feels a little bit like magic.