Open your fridge right now and look at that carton of store-bought broth. Read the ingredient list. I’ll wait. Water, “chicken flavor,” yeast extract, maltodextrin, “natural flavors” — and about as much actual chicken as a chicken-flavored cough drop.
Now imagine a stock so rich it turns to jelly in the fridge, so golden it glows, made from a carcass you were going to throw away. That stock costs you essentially nothing, takes ten minutes of actual work, and will ruin store-bought broth for you forever. This is that recipe.
If you raise backyard chickens, this is the highest-value thing you can do with the leftovers — our https://amesfamilyfarm.com/cost-of-raising-backyard-chickens-2026/ breakdown shows how every part of the bird stretches your food dollar, and stock is the crown jewel. Even if you buy rotisserie chickens from the store, save every carcass. The freezer bag labeled “stock parts” is about to become your favorite kitchen asset.
Stock vs. Broth: What’s the Difference?
People use the words interchangeably, but they’re different things:
- Stock is made from bones (and carcasses), simmered long and slow to extract collagen, gelatin, minerals, and deep flavor. It gels when chilled. It’s the foundation of professional cooking.
- Broth is made from meat, simmered briefly. It’s lighter, ready to sip, but it doesn’t have stock’s body.
This recipe makes true stock. The gel test below is how you’ll know you nailed it.
The Recipe: Carcass to Liquid Gold
Makes about 4 quarts
Ingredients:
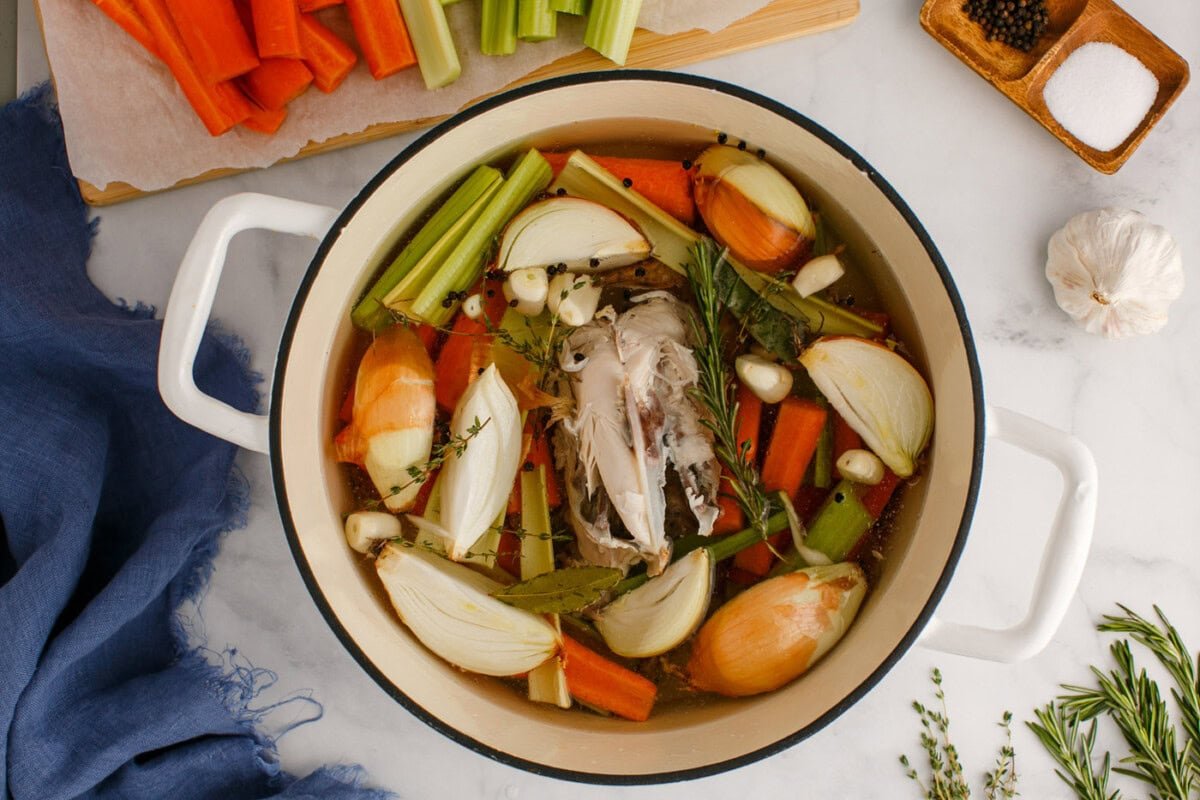
- 1 chicken carcass (roast chicken, rotisserie, or raw backs/necks/wings — about 2–3 lbs of bones), broken into pieces to fit the pot
- Cold water to cover (about 4–5 quarts)
- 2 tablespoons apple cider vinegar (optional but recommended — it helps draw minerals from the bones; you won’t taste it)
- 2 carrots, roughly chopped
- 2 celery stalks, roughly chopped
- 1 large onion, quartered (skin on is fine — it adds golden color)
- 4–5 garlic cloves, smashed
- 2 bay leaves
- 1 tablespoon whole black peppercorns
- A handful of parsley stems and a few sprigs of thyme (optional)
The golden rule of stock vegetables: bones first, vegetables second. Add the veg in the last 1–2 hours of simmering — if they cook the whole time, they turn bitter and muddy the flavor.
Step-by-Step: From Carcass to Stock
1. Load the pot. Place the broken-up carcass in your largest stockpot. Add cold water to cover by about 2 inches. Starting with cold water (not hot) gives you a clearer stock — it lets impurities rise slowly so you can skim them.
2. Bring up slowly and skim. Set over medium-high heat and bring just to a gentle simmer — not a rolling boil. As it heats, grayish foam will rise. Skim it off with a spoon and discard. This takes about 20–30 minutes of occasional skimming. A boiled stock turns cloudy; a simmered stock turns golden and clear.
3. Add the vinegar, then simmer low for 4–6 hours. Stir in the vinegar, reduce heat to the barest simmer — you want lazy bubbles breaking the surface every few seconds, not a churn. Partially cover the pot. Walk away. Check occasionally, skimming any foam, topping up with water if bones become exposed.
4. Add vegetables for the last 1–2 hours. Toss in the carrots, celery, onion, garlic, bay leaves, peppercorns, and herbs. This timing keeps the vegetable flavor bright instead of stewed-out.
5. Strain. Turn off the heat. Remove the big bones with tongs, then pour the stock through a fine-mesh strainer into a large bowl or clean pot. For crystal-clear stock, strain a second time through cheesecloth. Discard the spent bones and vegetables — they’ve given everything they had.
6. Chill fast. Divide into shallow containers so it cools quickly (a big deep pot stays warm in the center too long). Refrigerate uncovered until cold, then cover. Never leave stock at room temperature more than 2 hours.
7. De-fat. Once chilled, the fat rises and hardens into a cap on top. Lift it off with a spoon. (Save it — that’s schmaltz, liquid gold for roasting potatoes.) What’s underneath should be your stock.
The Gel Test: How You Know It’s Perfect
Refrigerate your stock overnight, then look at it. If it wobbles like jelly — jiggling when you tilt the container — you made real stock. That gel is dissolved collagen from the bones, and it’s the difference between homemade and store-bought in every soup, sauce, and risotto you’ll ever make. It melts back to liquid the second it hits heat.
Didn’t gel? Don’t panic — it’s still delicious and nutritious. Next time: use more joint-heavy bones (wings, feet, necks, and backs have the most collagen), add less water, simmer longer, and make sure it never boiled hard. Chicken feet from a butcher or farmers’ market are the cheat code — a pound of feet in the pot guarantees a wobble.
Storing Your Stock: Three Safe Options
Refrigerator (3–4 days). Keep it in sealed jars or containers. Bring to a full boil before using if it’s been sitting more than a couple of days.
Freezer (up to 1 year). The easiest long-term option. Freeze in quart containers, zip-top bags laid flat (they stack like books), or ice-cube trays for small portions — frozen stock cubes are perfect for pan sauces. Leave 1 inch of headspace in rigid containers; liquid expands.
Pressure canning (shelf-stable, 1 year). This is the homestead power move — shelf-stable quarts ready anytime. Critical safety rule: stock is a low-acid food and must NEVER be water-bath canned. Water-bath temperatures cannot kill botulism spores in low-acid foods. Pressure can only:
1. Reheat your strained stock to boiling.
2. Fill hot, clean quart or pint jars, leaving 1 inch of headspace.
3. Wipe rims, apply new lids, fingertip-tight rings.
4. Process in a pressure canner at 10 lbs pressure (weighted gauge) or 11 lbs (dial gauge): pints 20 minutes, quarts 25 minutes (at 0–2,000 ft; adjust pressure up for higher altitude per your canner’s manual).
5. Cool, check seals, label, and store.
If you don’t have a pressure canner yet, stick with freezing — it’s completely safe and just as good. For the full rundown on which foods need which method, our https://amesfamilyfarm.com/water-bath-canning-for-beginners/ guide covers the water-bath side.
FAQ
Can I use a rotisserie chicken carcass?
Absolutely — it’s the best starter carcass. The roasted bones add deep flavor. Pick off all the usable meat first (hello, chicken salad), then the carcass goes in the pot.
My stock tastes bland. What happened?
Three likely causes: too much water for the bones, not enough simmering time, or no salt. Stock isn’t salted during cooking (you season the final dish), but an under-reduced stock tastes thin. Simmer it longer to concentrate, or start with less water next time.
Can I make stock in a slow cooker or Instant Pot?
Yes. Slow cooker: low 8–12 hours. Pressure cooker (for cooking, not canning): 45–60 minutes at high pressure with natural release — it extracts gelatin beautifully. Just remember: cooking stock in an Instant Pot is fine; *canning* in one is not.
How do I use frozen stock cubes?
Pop a few into the pan after searing meat for an instant pan sauce, melt into rice instead of water, or drop into any soup. They’re the secret weapon of fast weeknight cooking.
Is it safe to can stock in a water bath “like grandma did”?
No. Grandma was lucky, or grandma’s stock made someone sick and nobody connected it. Botulism spores survive boiling water and thrive in sealed, low-acid jars. Pressure can or freeze — those are the only safe options.
Conclusion: The Free Ingredient That Changes Everything
Here’s the math that matters: a carcass you’d throw away becomes four quarts of stock. At store prices, that’s $12–$16 of broth — except yours is better in every measurable way. More flavor, more nutrition, zero mystery ingredients, and that beautiful gel that tells you it’s the real thing.
Start the bag in your freezer today. Every roast chicken, every rotisserie bird, every batch of wings — bones go in the bag. When it’s full, you make stock. It becomes a rhythm, like feeding the chickens or collecting eggs.
This week: save your next carcass instead of tossing it. Simmer it Sunday afternoon while you meal-prep. And when you ladle that golden stock over the https://amesfamilyfarm.com/no-knead-farmhouse-bread/ you’ll be baking, you’ll understand why nobody on this farm buys broth anymore.