While most gardeners are still flipping through seed catalogs in January, winter sowers are already growing. Their secret? A pile of empty milk jugs, a bag of potting mix, and the snow piling up outside.
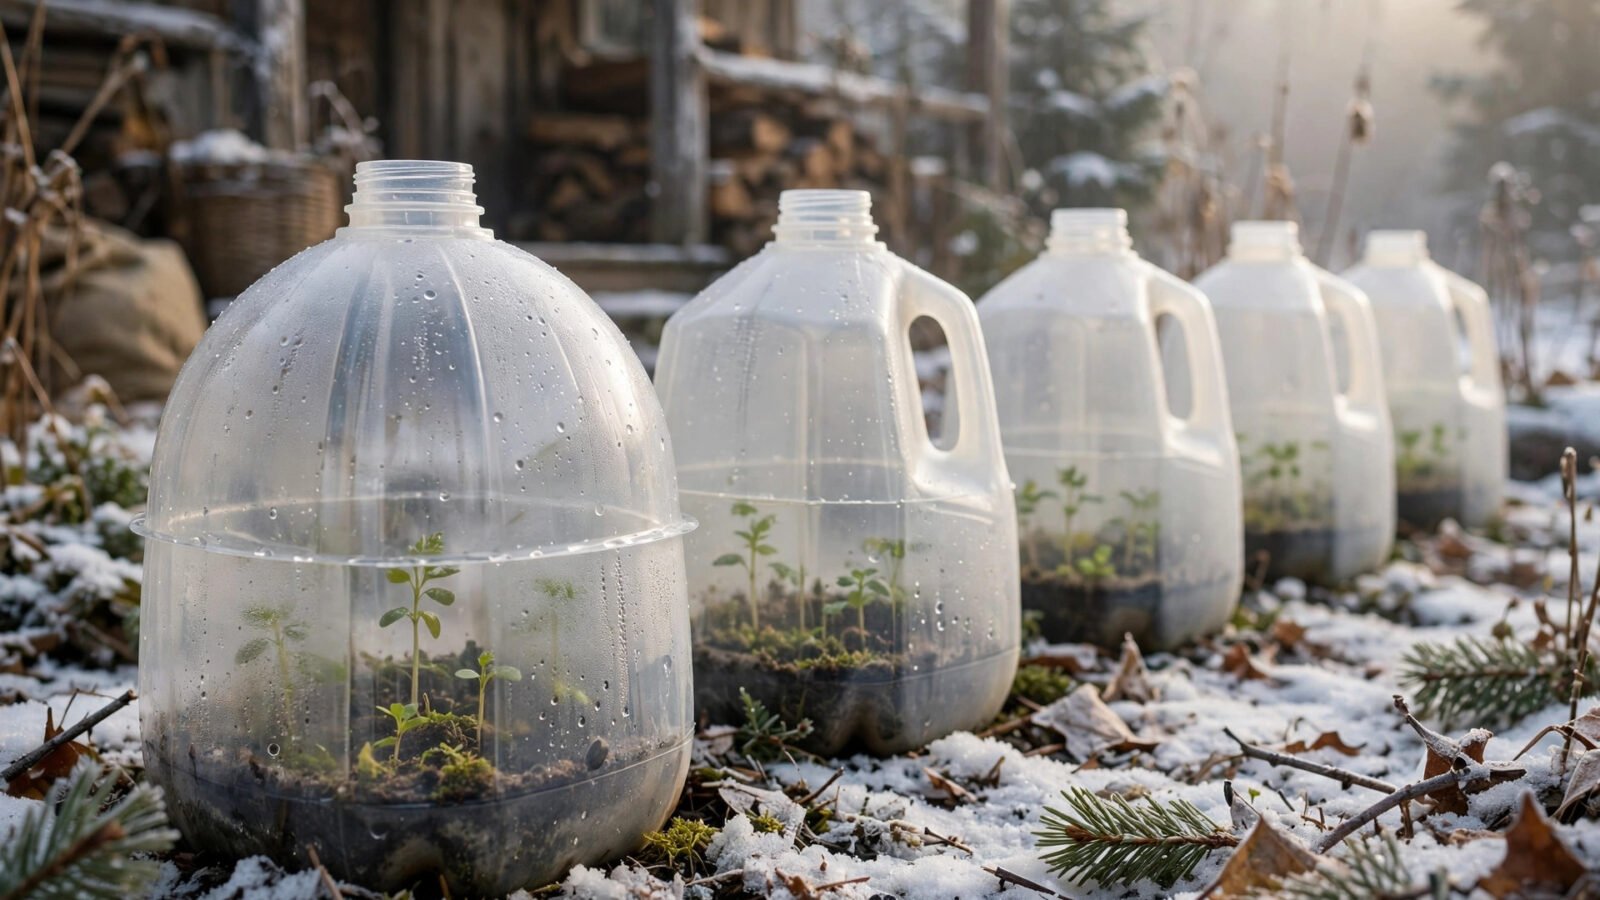
Winter sowing means planting seeds in mini greenhouses made from recycled jugs and setting them outside in winter. The seeds do what nature intended: they wait out the cold, then sprout on their own perfect schedule in spring. No grow lights. No heating mats. No leggy seedlings stretching toward a windowsill.
Here’s how to do it — and why the snow-season timing is the whole point.
Why Winter Sowing Works So Well
Seeds of hardy plants evolved to fall to the ground in autumn, sit through winter, and germinate when conditions are right. Winter sowing simply recreates that process in a protected little greenhouse. The benefits are hard to beat:
- Zero indoor space needed. Your jugs live outside on a patio, deck, or driveway.
- No hardening off. Seedlings grown outdoors are already acclimated — no week of carrying trays in and out.
- Stronger plants. Winter-sown seedlings grow stockier with better root systems than indoor-started ones.
- Natural timing. Seeds sprout when *they* decide conditions are right, not when your calendar says so.
- Free cold stratification. Many perennials and wildflowers *need* a freeze-thaw cycle to germinate. Winter sowing delivers it automatically.
If you’re new to growing food at home, pair this with https://amesfamilyfarm.com/homesteading-for-beginners-skills/ to see where seed-starting fits in your first-year skill stack.
What to Sow and When
Not everything wants a January start. Here’s the general schedule (adjust for your USDA zone):
December–January: The Cold-Hardy Crew
These seeds need — or at least tolerate — deep cold:
- Perennials: echinacea, rudbeckia, lavender, columbine, milkweed
- Hardy annuals: sweet peas, larkspur, bachelor’s buttons, poppies
- Vegetables: kale, spinach, lettuce, onions, leeks
- Herbs: parsley, chives, thyme, oregano
February: The Middle Group
- Hardy vegetables: cabbage, broccoli, cauliflower, carrots
- Flowers: snapdragons, calendula, cosmos (yes, they self-seed in snow — they winter-sow fine)
- Herbs: dill, cilantro, fennel
March–Early April: The Tender Group
- Tender annuals: zinnias, marigolds, sunflowers, nasturtiums
- Vegetables: tomatoes, peppers, cucumbers, squash, beans (sow these last — they want warmth)
Rule of thumb: if a plant self-seeds in your garden or needs cold stratification on the packet, it’s a winter-sowing candidate. Truly tropical plants (basil, sweet potatoes) stay indoors.
The Milk Jug Method: Step by Step
What You’ll Need
1. Clean, translucent plastic milk or water jugs (1-gallon size is ideal)
2. Seed-starting mix or plain potting soil — not garden soil
3. Seeds of your choice
4. A sharp knife or box cutter
5. Duct tape
6. A drill or heated screwdriver (for drainage holes)
7. A permanent marker and labels or popsicle sticks
Step 1: Prep the jug
Rinse the jug well and remove the cap — toss the cap. The open spout is your ventilation and rain entry point. Using your knife, cut the jug almost all the way around, about 4 inches up from the bottom, leaving a 2-inch “hinge” under the handle so the top flips open like a clamshell.
Step 2: Add drainage
Poke 6–8 holes in the bottom of the jug. This is non-negotiable — winter-sown jugs sit in rain and melting snow, and soggy seeds rot.
Step 3: Fill with moist soil
Fill the bottom half with 3–4 inches of seed-starting mix. Water it thoroughly until it’s evenly damp, like a wrung-out sponge. Let excess water drain.
Step 4: Sow the seeds
Press seeds into the soil at the depth the packet recommends. For tiny seeds (lettuce, poppies), just scatter and press lightly — they need light to germinate. Label each jug with the variety and date.
Step 5: Seal it up
Close the top, tape the cut seam shut with duct tape, and set the jugs outside in a spot that gets sun but is sheltered from the worst wind. A south-facing wall or fence is perfect. Snow on top is fine — it’s insulation.
Step 6: Walk away
This is the hardest step. Do nothing. Let winter do the work. Check occasionally: if a warm, dry spell hits in March and the soil looks dry, water gently through the spout opening.
Step 7: Open the vents
When daytime temperatures are consistently above 50°F and seedlings have their first true leaves, pop the jugs open on warm days and close them at night. Once nights stay above 45°F, remove the tops entirely.
Step 8: Transplant
When seedlings are 2–3 inches tall and sturdy, transplant them into the garden — roots and all, in little soil chunks. Winter-sown seedlings transplant beautifully because they never knew a pampered indoor life. If your beds aren’t ready yet, https://amesfamilyfarm.com/chaos-gardening-for-beginners/ is the lowest-effort way to get plants in the ground.
Common Mistakes
Sealing the cap on. The #1 winter-sowing fail. The open spout lets rain in and heat out. Capped jugs cook seedlings on the first sunny March day.
Using garden soil. It’s too dense, may harbor disease, and freezes into a brick. Use bagged seed-starting mix — it’s the one supply worth buying.
Sowing tender seeds too early. Tomatoes and peppers sown in January in zone 5 may germinate during a February thaw, then die in the March freeze. Hold heat-lovers until late March.
Forgetting to water in spring. Once the jugs warm up, they dry out fast. Check moisture weekly from March onward.
Planting too deep. Tiny seeds buried under an inch of soil never emerge. When in doubt, surface-sow and press.
FAQ
Does winter sowing really work in very cold climates (zones 3–4)?
Yes — arguably it works *best* there, because the freeze-thaw cycle is strong and reliable. The method was popularized in New York winters. Just stick to hardy varieties for your earliest jugs.
Can I use containers other than milk jugs?
Absolutely. Clear salad boxes, 2-liter soda bottles, rotisserie chicken containers, and translucent storage totes all work. The formula is the same: drainage below, ventilation above, translucent walls.
Do I need to protect jugs from heavy snow?
No. Snow is a fantastic insulator and melts into free watering. Just make sure jugs can’t blow away in winter storms — a milk crate or a sheltered corner handles that.
When will I see sprouts?
Patience. Hardy greens may show in late March; perennials often wait until April or May. If nothing sprouts by late May, the seeds failed — but success rates are typically 70–90% for appropriate varieties.
Can I winter-sow if I only have a balcony?
Yes! Jugs fit anywhere a container garden fits. A few jugs on a balcony railing or fire-escape landing work perfectly — just secure them against wind.
Your January Garden Awaits
Winter sowing is the rare gardening method that rewards laziness: set the jugs out in January, let the snow pile on, and come spring you’ll have sturdy seedlings for pennies per plant. No grow lights, no electric bill, no windowsill jungle.
This week, save three milk jugs, order one packet of kale and one of echinacea, and join the quietest, cheapest seed-starting club in gardening. Your spring garden will thank you — and so will your wallet.
Pin this: save the step-by-step above to your gardening board so it’s ready when the first jug is empty.