Every March, the same thing happens at our local nursery: shelves full of leggy, overpriced tomato starts, and gardeners paying four dollars a plant for something that cost them four dollars total in seeds. I did that for two years before I finally asked myself — what am I actually afraid of here?
Starting seeds indoors sounds technical. Trays, grow lights, heat mats, hardening off — the vocabulary alone is intimidating. But here’s the truth: when you strip it down, starting seeds indoors for beginners is one of the cheapest, highest-leverage skills a homesteader can learn. A packet of tomato seeds costs three dollars and holds thirty plants. Those same thirty plants as nursery starts would run you close to a hundred and twenty.
This guide covers the whole thing, start to finish, the way I wish someone had shown me: what to buy, when to sow, how to keep seedlings alive, and how to move them outside without killing them.
Why Start Seeds Indoors at All?
The honest answer is simple: a head start. In our zone, peppers and tomatoes need more warm weeks than the outdoor season gives them. Starting indoors buys you six to eight weeks. That means actual ripe peppers instead of green ones at the first frost.
There are two other reasons worth mentioning. First, variety. The seed catalog has hundreds of tomato varieties; the nursery has six. If you want the weird heirlooms and the disease-resistant workhorses, seeds are the only way. Second, cost — but honestly, the variety argument is the one that hooked me for good.
📌 Pin this: Start with just 2–3 types of plants your first year (tomatoes, peppers, and basil is a perfect beginner trio). Success with three trays beats failure with twelve.
Step 1: Time It Right
This is the step most beginners get wrong, and it’s also the easiest to fix. Every seed packet has a “start indoors X weeks before last frost” note. Find your average last frost date (your local extension office or any gardening site can tell you in thirty seconds), count backward, and mark your calendar.
Roughly, in most zones:
- Peppers: 8–10 weeks before last frost
- Tomatoes: 6–8 weeks before last frost
- Basil and herbs: 4–6 weeks before last frost
The classic beginner mistake is starting too early. A tomato started twelve weeks early doesn’t become a super-plant — it becomes a leggy, root-bound mess that sulks for a month after transplant. Trust the calendar, not your February optimism. I know it’s hard. Every year I have to talk myself out of starting peppers in January.
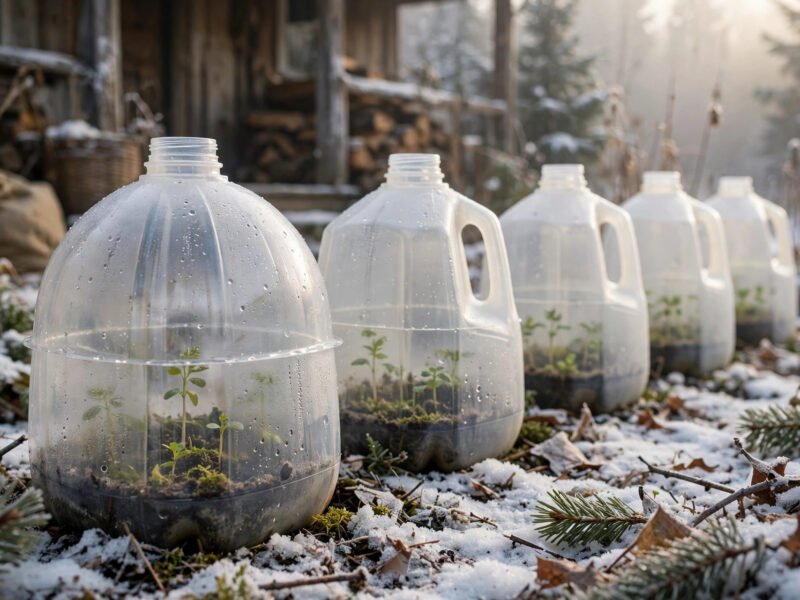
If you missed the indoor window entirely, don’t panic — you can always start seeds outdoors in winter with the milk jug method from our winter sowing milk jug method winter sowing guide, which needs zero equipment at all.
Step 2: Gather Your Supplies
You don’t need the fancy greenhouse setup from the catalogs. My first year, I spent about thirty dollars total, and most of it lasted for years. Here’s what actually matters:
- Seed trays or small pots. Standard 72-cell trays are cheap and work fine. Reuse yogurt cups with holes poked in the bottom if you’d rather — free beats fancy.
- Seed starting mix. This is the one thing worth buying properly. Regular potting soil is too heavy for tiny seeds; seed starting mix is fine, light, and drains well. One bag goes a long way.
- A light source. This is the big one, and the one people skip. A sunny windowsill is almost never enough — seedlings stretch toward the light and get tall and weak. A simple shop light with daylight bulbs, hung two inches above the seedlings, costs about twenty dollars and changes everything.
- Labels. You will forget what you planted. Everyone does. Popsicle sticks and a marker.
- A spray bottle. For watering gently without blasting tiny seedlings out of their cells.
Heat mats are nice but optional — most seeds germinate fine at room temperature on top of a refrigerator. Save your money for year two.
Step 3: Sow the Seeds
Fill your trays with damp (not soggy) seed starting mix, pressing it down lightly. Then sow according to the packet:
- Most seeds go about twice as deep as they are wide. Tiny seeds like basil barely get covered at all — just press them into the surface.
- Sow two seeds per cell. You’ll thin to the strongest one later, and two gives you insurance.
- Mist the surface, cover the tray with a clear dome or a sheet of plastic wrap, and put it somewhere warm.
Then — and this is important — do nothing. Seeds don’t need light until they sprout, and they definitely don’t need you checking on them every hour. I check once a day, mist if the surface looks dry, and otherwise leave them alone. Impatience kills more seeds than anything else.
Step 4: Give Them Light (Lots of It)
The moment seedlings poke through, get them under the light. Hang it so the bulbs are just two to three inches above the tops of the plants, and raise it as they grow. This is the entire secret of sturdy seedlings: strong light, close by, for 14–16 hours a day.
A timer on the light is the best three-dollar upgrade you’ll ever make. Seedlings on a windowsill get maybe six hours of weak, one-directional light and turn into pale, floppy noodles reaching for the glass. Seedlings under a cheap shop light for sixteen hours become short, stocky, and dark green.
If your seedlings are leggy anyway, it’s not a disaster — transplant tomatoes deeper (they root along the buried stem), and for everything else, just get the light closer. Learn the lesson for next year.
Step 5: Water and Feed Carefully
Water from the bottom when you can — set the tray in a shallow dish of water for ten minutes and let the mix wick it up. Top-watering with a can knocks seedlings flat and encourages damping-off, the fungal disease that melts tiny stems at the soil line. A spray bottle for the surface, bottom-watering for the roots — that’s the rhythm.
Run a gentle fan nearby on low for a few hours a day. It sounds silly, but the breeze makes stems grow thicker and stronger, like little plant workouts. It also keeps the air moving, which cuts down on that damping-off fungus.
Once seedlings have their first set of true leaves (the second pair — the first pair are just seed leaves), start feeding with a half-strength liquid fertilizer once a week. Seed starting mix has almost no nutrients in it, and hungry seedlings stall out. Half-strength, not full — tiny plants, tiny appetites.
Step 6: Thin Without Mercy
This is the step that hurts. When both seeds in a cell sprout, you keep the stronger one and snip the weaker one at the soil line with little scissors. Don’t pull it — you’ll disturb the winner’s roots.
It feels wasteful the first time. Do it anyway. Two seedlings in one cell become two weak seedlings; one seedling alone becomes a strong one. The whole point of starting seeds indoors is strong plants, so don’t undermine yourself with sentimentality. Every experienced gardener I know says the same thing: learning to thin was the moment they started growing like a grower.
Step 7: Harden Off (Don’t Skip This)
Your pampered indoor seedlings are soft. If you plant them straight outside, the sun, wind, and temperature swings will shock them — leaves bleach white, plants wilt, and growth stalls for weeks. Hardening off is how you avoid that.
About a week to ten days before transplanting, start taking the trays outside:
- Days 1–2: One to two hours in shade, then back inside.
- Days 3–4: Three to four hours, some gentle morning sun.
- Days 5–7: Most of the day outside, in the sun.
- Days 8+: Overnight outside if temperatures stay above 50°F.
Bring them in if frost threatens, and reduce watering slightly during this period — a touch of stress tells the plant to toughen up. It takes discipline, but it’s the difference between transplants that take off and transplants that sulk.
Step 8: Transplant on a Cloudy Day
Plant in the late afternoon or on an overcast day so the sun doesn’t hammer fresh transplants. Dig the hole, water it in, set the plant at the same depth it was growing (except tomatoes — bury those deep), firm the soil gently, water again, and mulch around the base.
Then leave them alone for a couple of days. They’ll look a little sad for 48 hours and then suddenly take off. That first week of new growth is one of my favorite things on the whole farm.
What to Grow First (and What to Skip)
Your first year, stick to the easy winners: tomatoes, peppers, basil, marigolds, zinnias, and squash-family plants started just a few weeks early. These are forgiving, fast, and satisfying.
Skip the slow, fussy stuff until year two: celery (takes forever), artichokes (long season, temperamental), and anything the packet warns “difficult to transplant” — like sweet potatoes or corn. There’s no prize for suffering. Build your confidence with the easy ones, and the hard ones will still be there next spring.
And remember that indoor seed starting is just one tool. Some years I go full indoor setup; other years I scatter seeds directly and embrace the beautiful mess of chaos gardening for beginners chaos gardening. Both are valid. The garden doesn’t care about your philosophy — it cares about seeds in soil.
The Compost Connection
One more thing, because it closes the loop: when you transplant your seedlings out, feed them with real, finished compost. Store-bought fertilizer works, but nothing beats a shovelful of your own black gold around each transplant. If you’re not composting yet, our composting 101 beginners guide composting guide will get you started — your seedlings will thank you by July.
Starting seeds indoors felt like a chemistry experiment the first time I tried it. By the third year, it was just something we do in March, like changing the clock batteries. Start small, follow the steps, and give yourself permission to learn by doing. Your garden — and your wallet — will be glad you did.